
October 24, 2026
Fitting Solar to Your Van Roof Rack: A Practical 12V Guide for Sprinter, Crafter and TGE Builds
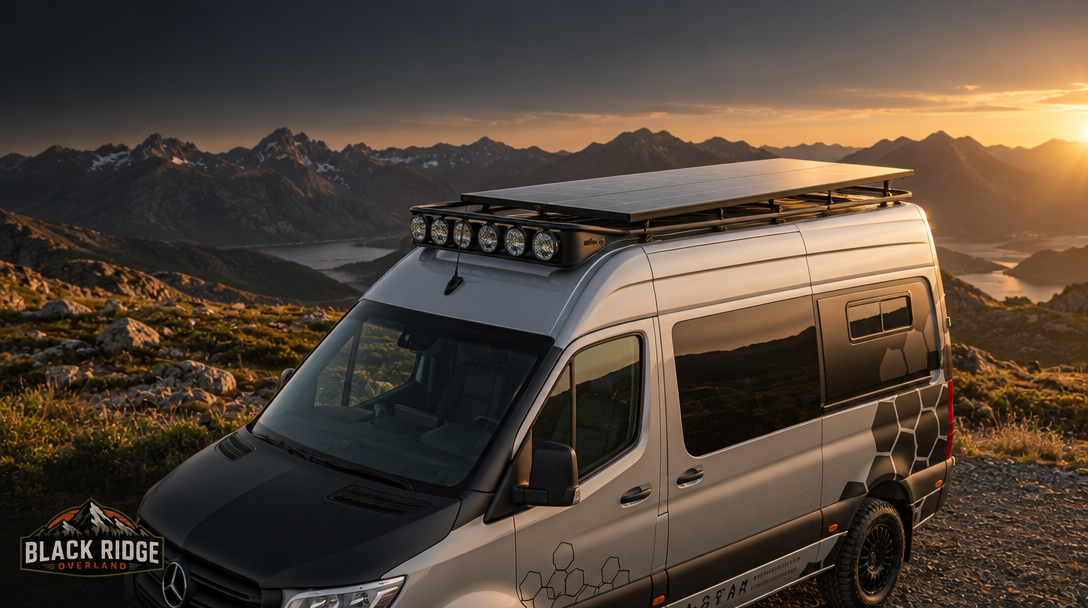
Solar is the part of a van build where good intentions meet real weather. A panel on the roof is only useful if it is mounted so it stays cool, wired so it stays dry, and sized against what you actually use each day. This guide works through the roof side of the job: mounting, airflow, cable routing and supports, on a Sprinter, Crafter or TGE with a Blackridge roof rack fitted.
Start with what you use, not what you can fit
The temptation is to buy the biggest panel that fits. Work the other way round.
Write down what you run off 12V in a typical day and add it up in amp-hours:
- A compressor fridge is the big one — it runs most in hot weather and it does not stop overnight
- Lights, phone charging and a water pump are small but constant
- A diesel heater is a heavy draw in winter and nothing in summer
- An inverter for a laptop or a kettle is a huge draw for a short time
That daily figure, multiplied by the number of days you want to sit still without driving, tells you roughly what the battery bank and the panel need to cover. Driving recharges through a DC-DC charger, so if you move every day your panel has an easier job.
Two people, a fridge and a few nights off hook-up is a modest system. A van with a heater, an inverter and a family inside it is not.
Why mounting height matters
A solar panel works on light, and it loses output as it heats up. Panels bolted flat against a solid surface get hot and stay hot, because there is nowhere for the heat to go.
Lifting a panel clear on supports does three things:
- Air moves underneath and carries heat away, so the panel runs cooler and produces more from the same sun
- Rain and condensation drain instead of sitting against the mounting face
- You get a proper mechanical fixing to a structural rack member rather than an improvised bracket
This is the reason Blackridge offers optional solar supports with the roof rack. If there is any chance you will add solar later, fit the supports when the rack goes on — retrofitting means taking the rack back off.
Planning the layout on the rack
A van roof rack is rarely just a solar frame. It also carries boards, boxes and recovery gear, and that kit casts shade. A panel with its long edge partly shaded loses far more output than the shaded area suggests, so plan the layout around the panel, not around it.
A few layout rules that hold up in practice:
- Keep the panel at the front or rear end of the rack where nothing else overhangs it
- Keep tall items — boxes, stacked boards — behind the panel’s long edge on the side the sun crosses
- Run the panel along the length of the van so it is narrow in profile and less affected by low sun angles
- Leave a walkway of deck board for loading, and use 120mm or 240mm rafters to bridge the frame where you need a fixing or a strapping point
On an LWB rack there is usually room to run a full-length panel down one side and keep a clear channel down the other. On an MWB rack, choices are tighter — often one panel and one board, not both.
Cable routing: where most installs leak
Water does not travel through a roof; it travels along a cable. Get the routing right and the install stays dry for years.
- Drop the cable in a gentle loop below the panel before it enters the roof, so water runs off the loop rather than into the gland
- Use a proper cable gland or entry box, sealed to the roof, not sealant around a bare cable
- Keep the positive and negative run together as a pair to minimise interference
- Protect the cable where it crosses the rack frame with conduit or a sleeve — vibration plus an aluminium edge will wear through insulation
- Leave a small service loop so the panel can be lifted or replaced without cutting the run
Take the cable down through the roof into the interior as directly as you can, then to the charge controller. Keep the controller close to the battery where practical, and keep the run from panel to controller as short as the layout allows.
Charge controller, battery and fusing
A solar charge controller sits between the panel and the battery. MPPT controllers suit van installs because they handle the voltage difference between panel and battery better in mixed light, which is most of the time in the UK.
Every circuit wants a fuse or breaker rated for the cable it protects, fitted as close to the battery positive as you can get it. That includes the solar input, the DC-DC charger, and every fused distribution block downstream. Cable size is set by current and length — undersized cable wastes power as heat and is a fire risk.
If any of this is outside your comfort zone, have the electrical side signed off by an auto electrician. The roof work and the wiring are separate jobs and it is fine to do one yourself and pay for the other.
Testing before you commit
Before you seal anything permanently, connect the system and watch it for a day. Check the controller’s readings at midday and again in the evening, and check them again on a dull day — that is the number that decides whether the system suits how you travel. It is far easier to change a panel now than after the roof is sealed.
A roof-side checklist
- Work out daily 12V use before choosing a panel size
- Fit solar supports with the rack, not after
- Keep the panel clear of anything that will shade its long edge
- Plan deck boards and rafters around the panel layout
- Use a sealed gland and a drip loop at the roof entry
- Fuse every circuit at the battery
- Test the system for a full day before sealing the roof
Get the roof side right and the rest of the electrical system has a sound foundation to build on. If you are planning a solar fitment on a Sprinter, Crafter or TGE and want to confirm the rack and support options for your van, send over your vehicle details and we will check the fitment before you order.